WEATHER ELEMENT
Posted by 1 1 on
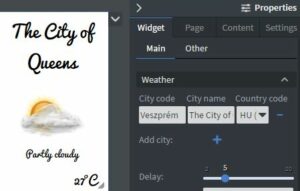
With the Weather widget, you can display the weather of a location in your content.After server version 1.9.69We significantly reworked our weather widget due to changing to another weather service. We made it more user friendly to use. Before, you had to write and underline and a shorten country code (ISO 3166-1 alpha-2) after the city name. Now, you can do it more easily.
An example: Veszprém is also known as The City of Queens. I want to show “The City of Queens” on the screen instead of “Veszprém”. The settings for this will be:
Before server version 1.9.69 |
|
 |
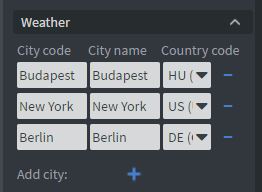
In the Weather Menu, you can select the cities that you want to display in your widget, by typing their name or zip code into the text box. To ensure the Weather widget gathers the correct weather data of a city, you can add the shorten country code (ISO 3166-1 alpha-2) after an underline “_” character. For example, 8200_hu, which is Veszprém, Hungary. |
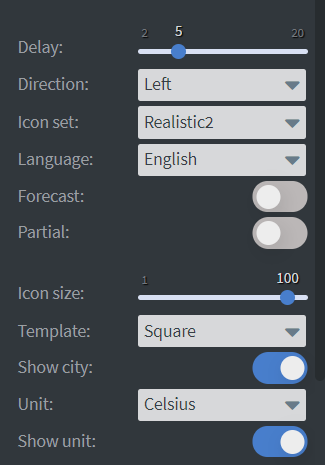 |
If you want to display the weather of multiple cities you can set the Delay between them. You can set the Direction of the animation between displayed cities here.
You can set the displayed weather icon type with the Icon Set function. You can choose the Language of the widget to display data in different languages. In the Unit selector, you can choose to display the temperature in Celsius or Fahrenheit. You can turn off Show unit behind the temperature data here. You can also turn off the Show city function. |
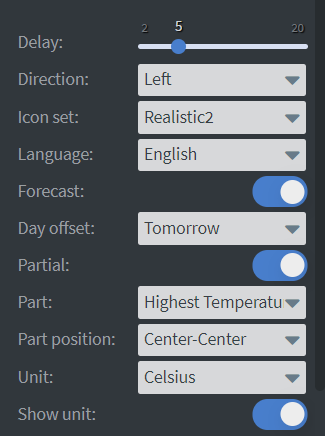 |
If you enable the Forecast function you can select which following day the widget should display in Day offset selector. You can select from ‘Today’ to ‘+9 days’.
If you enable Partial function you can choose one thing you want to display in the widget. You can choose to only display the Temperature, City, Icon etc. You can set the alignment on this specific information in Part position setting. |
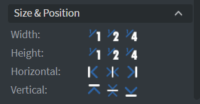 |
In the Size & Position Menu you can select the width, height, and placement of your widget quickly.
See more specified information about: Size&Position. |
 |
In the Font Menu you can set the Font size, Font family, Style, and the Font color.
You can also set Letter spacing, Custom line height, Text shadow and Letter case to your widget here. See more specified information about: Using font. |
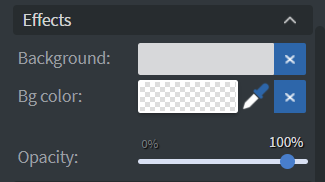 |
In the Effects Menu you can select a background image or color for your widget. You can also set the Opacity of the widget here. |
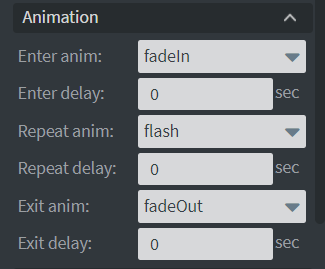 |
In the Animation Menu you can choose the Enter, Repeat ,and Exit animations of your widget. See more specified information about: Animation. |
Here are some city name examples that you can use:
Kingston, New York = Kingston_N
Kingston, Jamaica = Kingston_J
Paris, France = Paris_FR
Paris, Texas = Paris_T
Budapest, Hungary = Budapest_HU
Edinburgh, Scotland = Edinburgh_GB
You can also use postal code with shortened country code too:
Veszprém, Hungary = 8200_HU
Charlotte, North Calorina = 28250_USA